Having visited New Zealand four times over the years, I’ve put together a guide to Mount Cook National Park so you can experience the beauty, camp under the stars, hike beautiful trails, and maybe even go for a polar plunge. Marvelling at Aoraki / Mount Cook—the tallest mountain in New Zealand—is something I wish everyone could experience. It truly is one of my favorite places in the New Zealand. Let’s get into it!
Note: The Hooker Valley track trail will be partially closed until March-May 2026 which means that you will have to stop before the second bridge (which is about halfway into the track). More info here.

A note from Angela:
There are affiliate links in this post, The Ultimate Guide to Mount Cook National Park, and I may earn a small commission if you choose to purchase an item (at no additional cost to you). These funds go right back into creating content just like this and supporting my small business. If you do choose to purchase something, thank you for your support!
Getting There
There’s only one road to Mount Cook National Park—State Highway 80, Mount Cook Road. It is absolutely stunning because it runs along Lake Pukaki, one of the bluest lakes I’ve ever seen.
While some buses can get you into the park (Intercity or Cheeky Kiwi), I recommend renting a car or campervan (I love Mad Campers) and driving there yourself as you’ll be able to stop along the way to marvel at the views, take a dip, or have a picnic with a seriously beautiful backdrop.
Keep in mind, to drive State Highway 80, it takes about 45 minutes from Twizel and 1 hour and 15 minutes from Lake Tekapo. You’ll reach Mount Cook Village at the end of the road.


On the drive in, stop at Peter’s Lookout and take photos and marvel at the views from roadside pull-offs along the way. Just make sure to drive safely and always ensure you’re off the road.
If you don’t want to or don’t have access to a car, there are a lot of tours—like this one—that run from Queenstown.
Day trip or Overnight?
You can have a really great day and see a lot of the park if you only have one day to explore! Start the day driving down the gorgeous road to the village, do a hike or two, and enjoy the views from the ground before continuing on your journey.
If time allows, I recommend spending two nights and three days in the park. This way, you can experience camping, hiking, backpacking, and an activity or two. If you’re planning on staying the night, I’ll go through some options. The options for stays are extremely limited inside the park, as the village is quite small. I often prefer to camp in the mountains because my trips are usually quite last-minute.
Read next: Best Hikes in Lofoten, Norway
Where to stay
The first option for you is to stay in Mount Cook Village. There is a very small range of stays, from luxury to budget-friendly and camping.
Hotels:
Since the number of stays is incredibly limited, I recommend booking as far in advance as possible if you want to stay in a hotel.
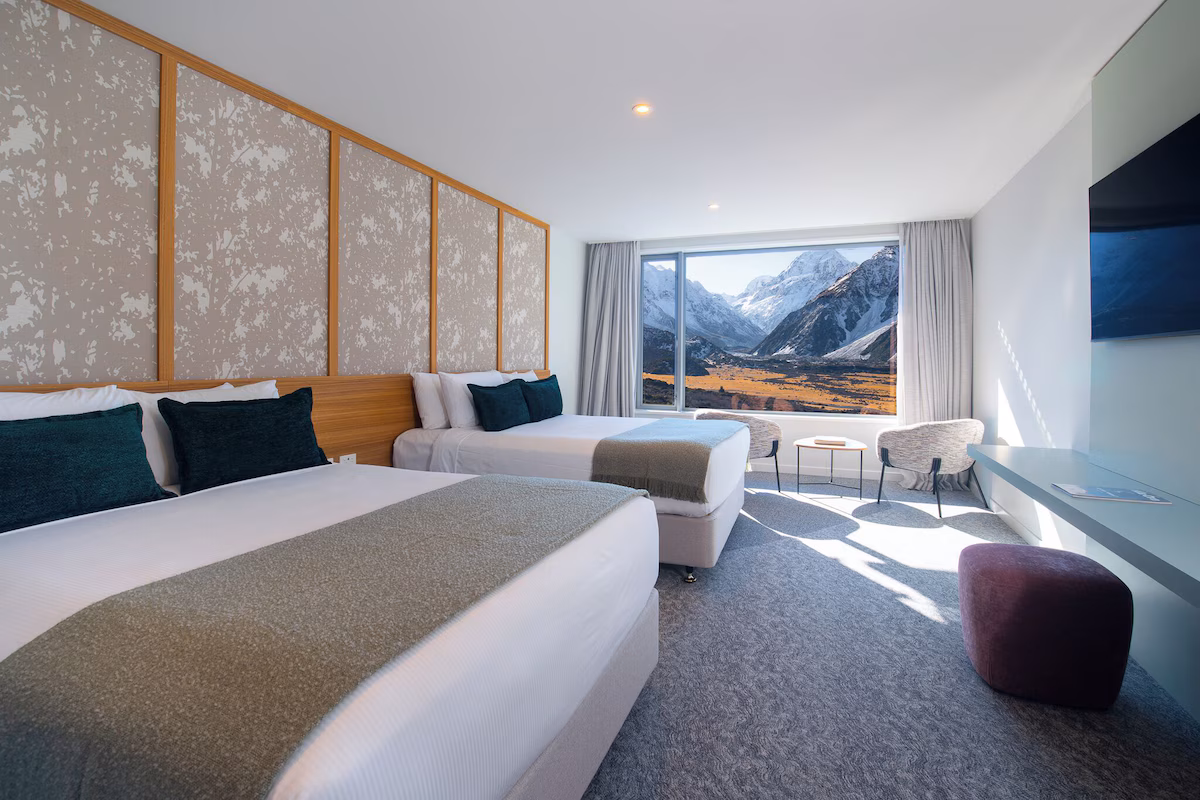
Luxury: Hermitage Hotel Mount Cook
This is the most prominent building in the village. It’s the most expensive option, but it also has unbeatable views and a perfect place to rest in between adventure days.
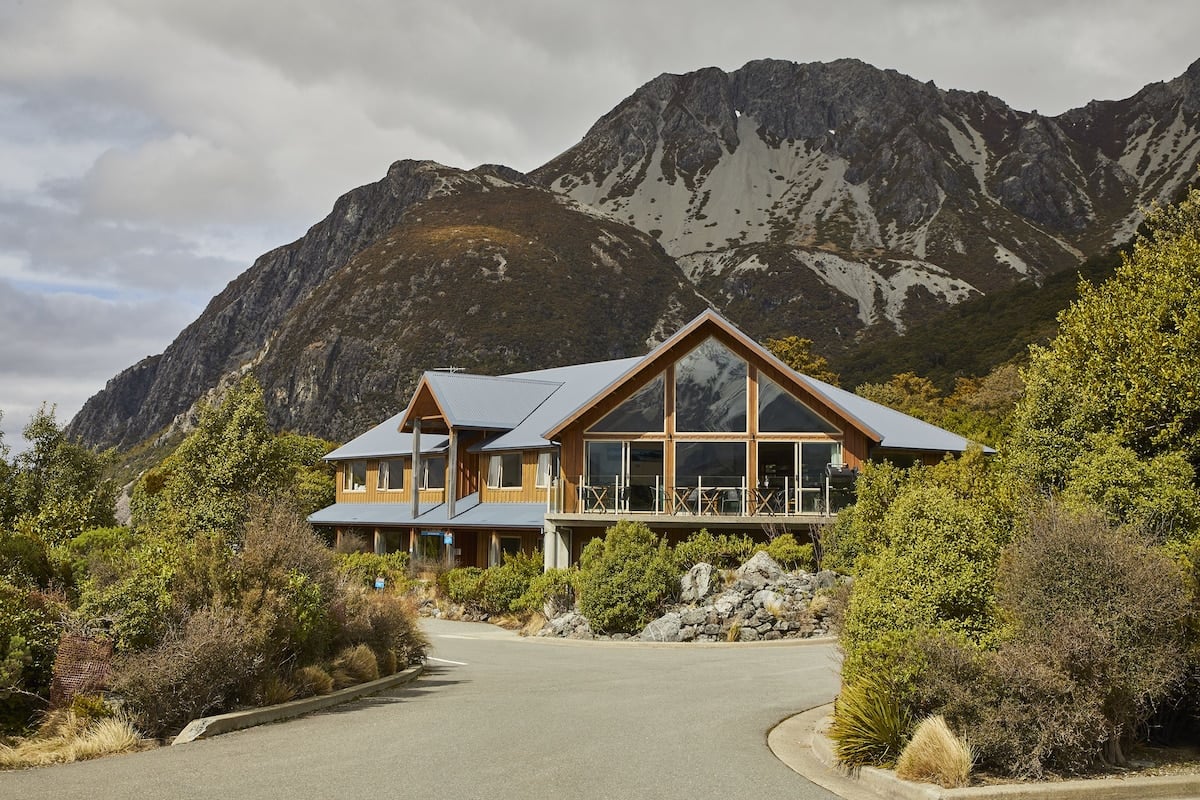
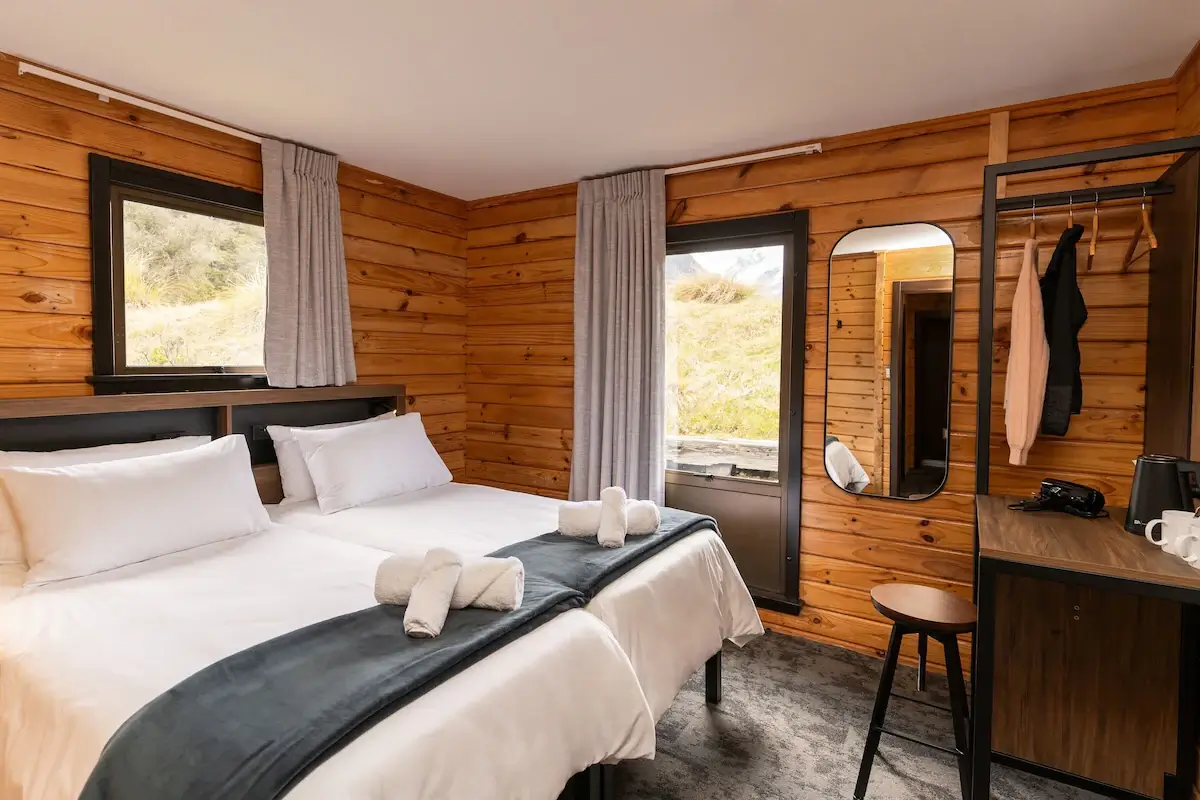
MidRange: Aoraki Mount Cook Alpine Lodge
If I were to book one on this list, it would be this one. The views are incredible, it’s a comfortable homestay, and it’s at a very reasonable price.

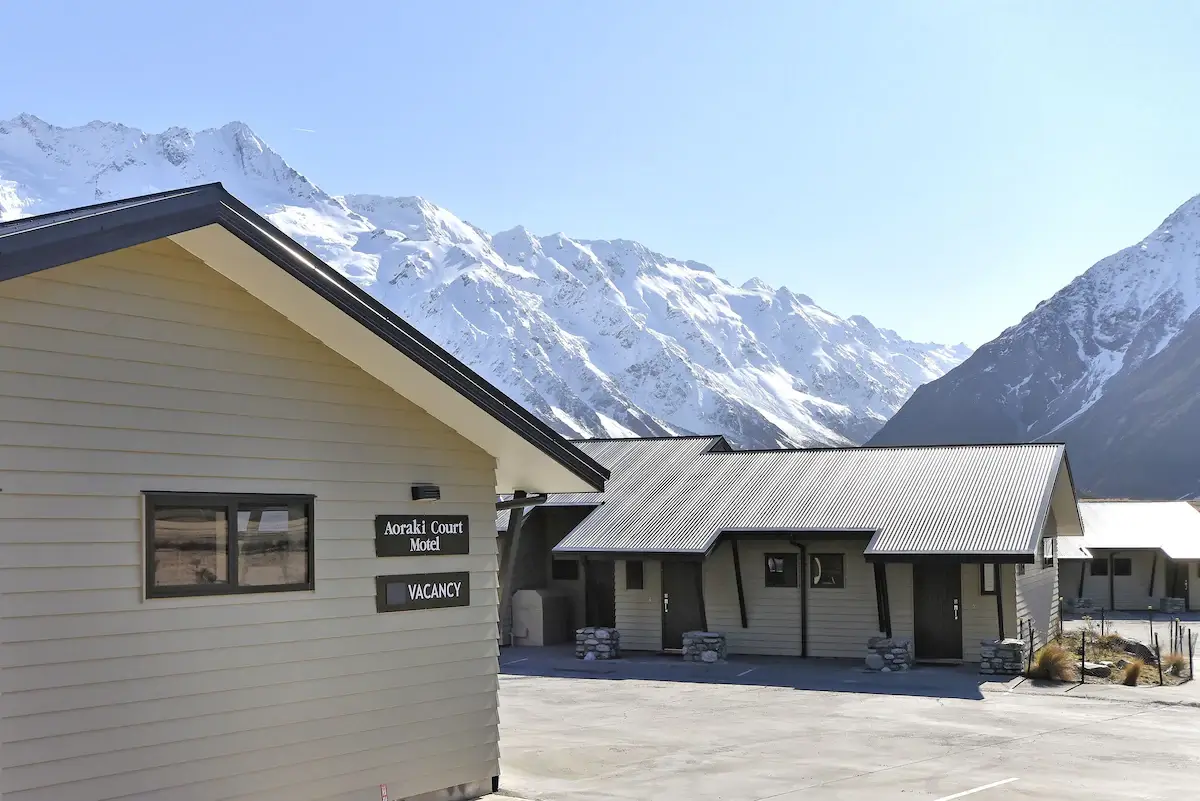
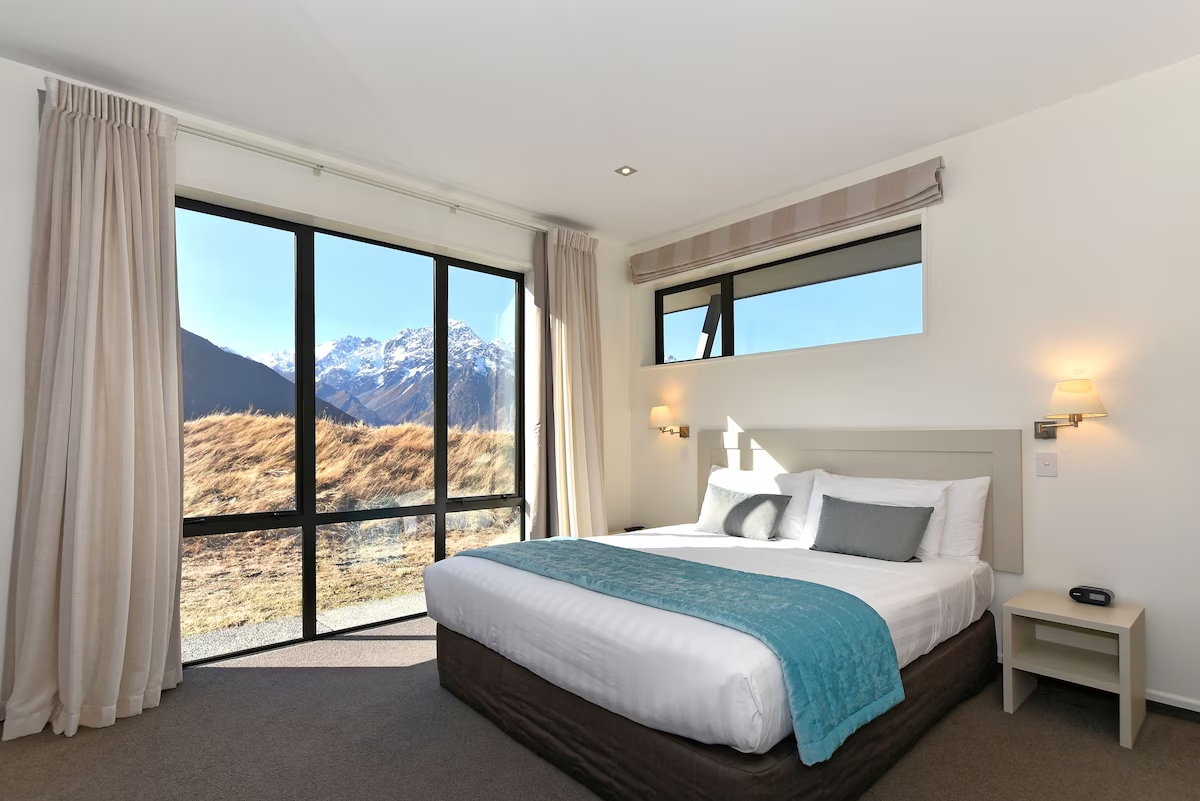
Motel: Aoraki Court Motel
This is another great option with incredible views! Not your average motel.
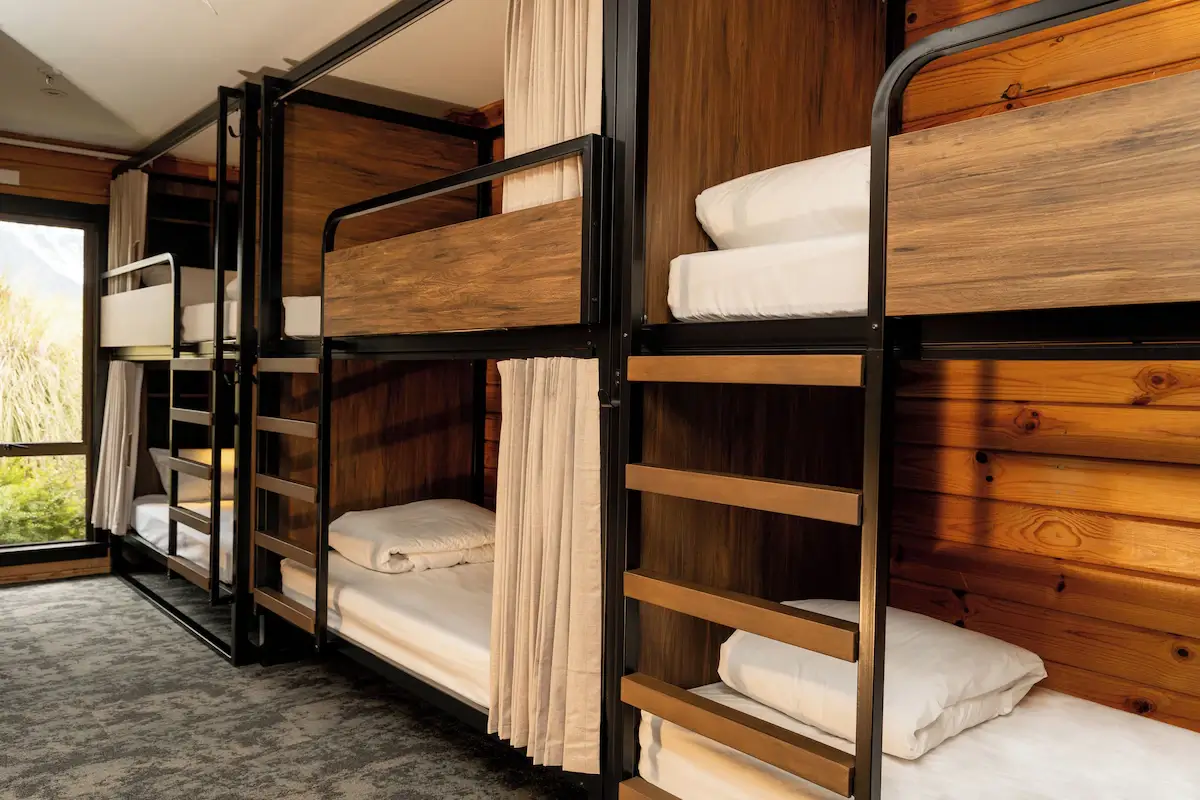
Hostel Option: Haka House Aoraki Mt Cook
This is the only hostel in Mount Cook village, and it’s a perfect place to stay if you’re on a budget. It’s also stunning and has a self-service kitchen, laundry, and areas to relax.
Read next: Backcountry Gear Guide
Campground Options:
White Horse Hill Campground: This is the only campground in the park. Bookings are required to stay the night, which can be made here. As you can imagine, this campground can get booked up fast, so I’d book this sooner rather than later if you’re keen on staying. Just a note, there’s no water or power at this campground and you need to bring cash. The location is perfect because it’s at the start of many amazing trails.
Glentanner Park: About 20 minutes outside the village is this campground, which is the only powered RV site near Mount Cook.
Freedom camping: You can freedom camp outside of the national park, mainly at the end of Lake Pukaki. It’s one of my favorite freedom camping sites in the country.
Backcountry huts and camping: In true Angela fashion, this is my first choice. There are some incredible mountain huts and backcountry camping options. I’ll share some of these options below.

If you can’t find anything in the village available for your dates, you could stay in Lake Tekapo and do day trips into the park. It’s a town that sits along another stunning lake and is an hour and 15 minutes to the park. I love the Galaxy Boutique Hotel and Grand Suites Lake Tekapo. Click here to search for other hotels in the area.
Another option outside the park is Twizel. It’s a small town about an hour’s drive away from the end of the park. I love the Mountain Chalets Motel. There are a few other options, like motels and entire homes.
Of course, you can always sleep in the mountains by backpacking or book one of the many huts in the park! I will share some of these options below. If you know me, you know that this is my favorite option.
Things to Know before you go
- Entry: There is no fee to enter, and it’s open all year.
- When to go: I have visited in spring, summer, and fall. If you want just to sightsee and do the easier, low-elevation walks, any season would be great! That said, if you want to hike and backpack, I’d recommend going in the summer or early fall, when the snow has melted.
- Weather: It’s very unpredictable, and it can get extremely windy. I wish I had brought a bandana or something to cover my mouth because the dust during the summer can be pretty hectic. Like any mountainous region, bring and wear layers!
- DOC Visitor Centre: A great first stop in Mount Cook Village for trail updates, safety info, and weather conditions.
- Keas: NZ’s large parrots are often flying around and peck at your food or campsite. They’re harmless, just a little cheeky.


Read next: 10 epic spots in NZ’s South Island
- Gas: There’s a self-service gas pump in Mount Cook Village, but it is extremely expensive, so I’d always go into the park with a full tank!
- Groceries: I’d also bring all the food you need before entering the park. I heard there’s a small convenience store in one of the hotels, but I haven’t visited it myself.
- Pack in, pack out: Never leave anything behind.
- Cell service: Depending on your network, cell service can be spotty. I’d download offline maps of all the trails you want to do, so you’re ready to go when you’re there.
- Hiking gear: Check out my day hiking guide, and my backpacking guide (with a checklist) to get prepared!
Top Things to Do
Hiking and Backpacking:
Of course, we need some trail suggestions in this guide to Mount Cook National Park! For a full list of hikes and places to camp — head to this blog post.
Hooker Valley Track:
One of the most popular and stunning trails in the park. It is an absolute jaw-dropper that brings you across swing bridges, along glacial-fed rivers, and offers incredible views of Aoraki Mount Cook. It ends at Hooker Lake and is. It’s common to have icebergs floating in the water, especially in the winter (but not so much in the summer).
- Length: 10.9 km / 6.8 miles round trip
- Elevation Gain: 197m / 646 ft
- Difficulty: easy/moderate
- Trail info: AllTrails and DOC
Sealy Tarns Track:
Commonly known as the ‘stairway to heaven,’ Sealy Tarns is a challenging trail that climbs 2,200 steps straight up the mountain. It’s a knee-crushing hike, yet one of the best hikes in Aoraki/Mount Cook National Park
- Length: 5.3 km / 3.3 miles round trip
- Elevation Gain: 546m / 1791 ft
- Difficulty: difficult
- Trail info: AllTrails and DOC

Mueller Hut:
Once you reach Sealy Tarns, you’ll continue on the trail. The stairs stop, and you start to climb up in elevation along a rocky trail while following the orange poles. This is a popular hike and backpacking trip because the views are absolutely breathtaking, there are a lot of spots to pitch a tent at the top, and you can stay the night in Mueller Hut. More information here.
- Length: 9.7 km / 6 miles round trip
- Elevation Gain: 1,056m / 3465 ft
- Difficulty: difficult
- Trail info: AllTrails and DOC
Sefton Bivouac:
This trail is extremely difficult and should only be attempted by experienced hikers. It’s super exposed and difficult. Once you get to the top, you get to soak up the beautiful valley view below with glacial lakes, rivers, and mountains. It really is a view to remember.
- Length: 12.2km / 7.6 miles round trip
- Elevation Gain: 944m / 3097 ft
- Difficulty: difficult
- Trail info: AllTrails and DOC


For more trail suggestions in Mount Cook National Park — click here.
Scenic Flights:
Another way to experience the park is by taking a scenic flight. I haven’t had the chance to do this yet, but it is at the top of my list for next time.
- Scenic helicopter flight with alpine landing — details and book here.
- Scenic helicopter flight with hike — details and book here.
- Glentanner High Country Heli Hike — details and book here.
- 55-Minute Scenic Flight in Helicopter or Ski Plane — details and book here.
Kayaking:
You can also go glacier kayaking on Tasman Lake, which is on my bucketlist, too. Guess it’s time to go back…