Note: there are affiliate links in this post and I may earn a small commission if you choose to purchase an item (at no additional cost to you). These funds go right back into creating content just like this and support my small business. If you do choose to purchase something, thank you for your support!
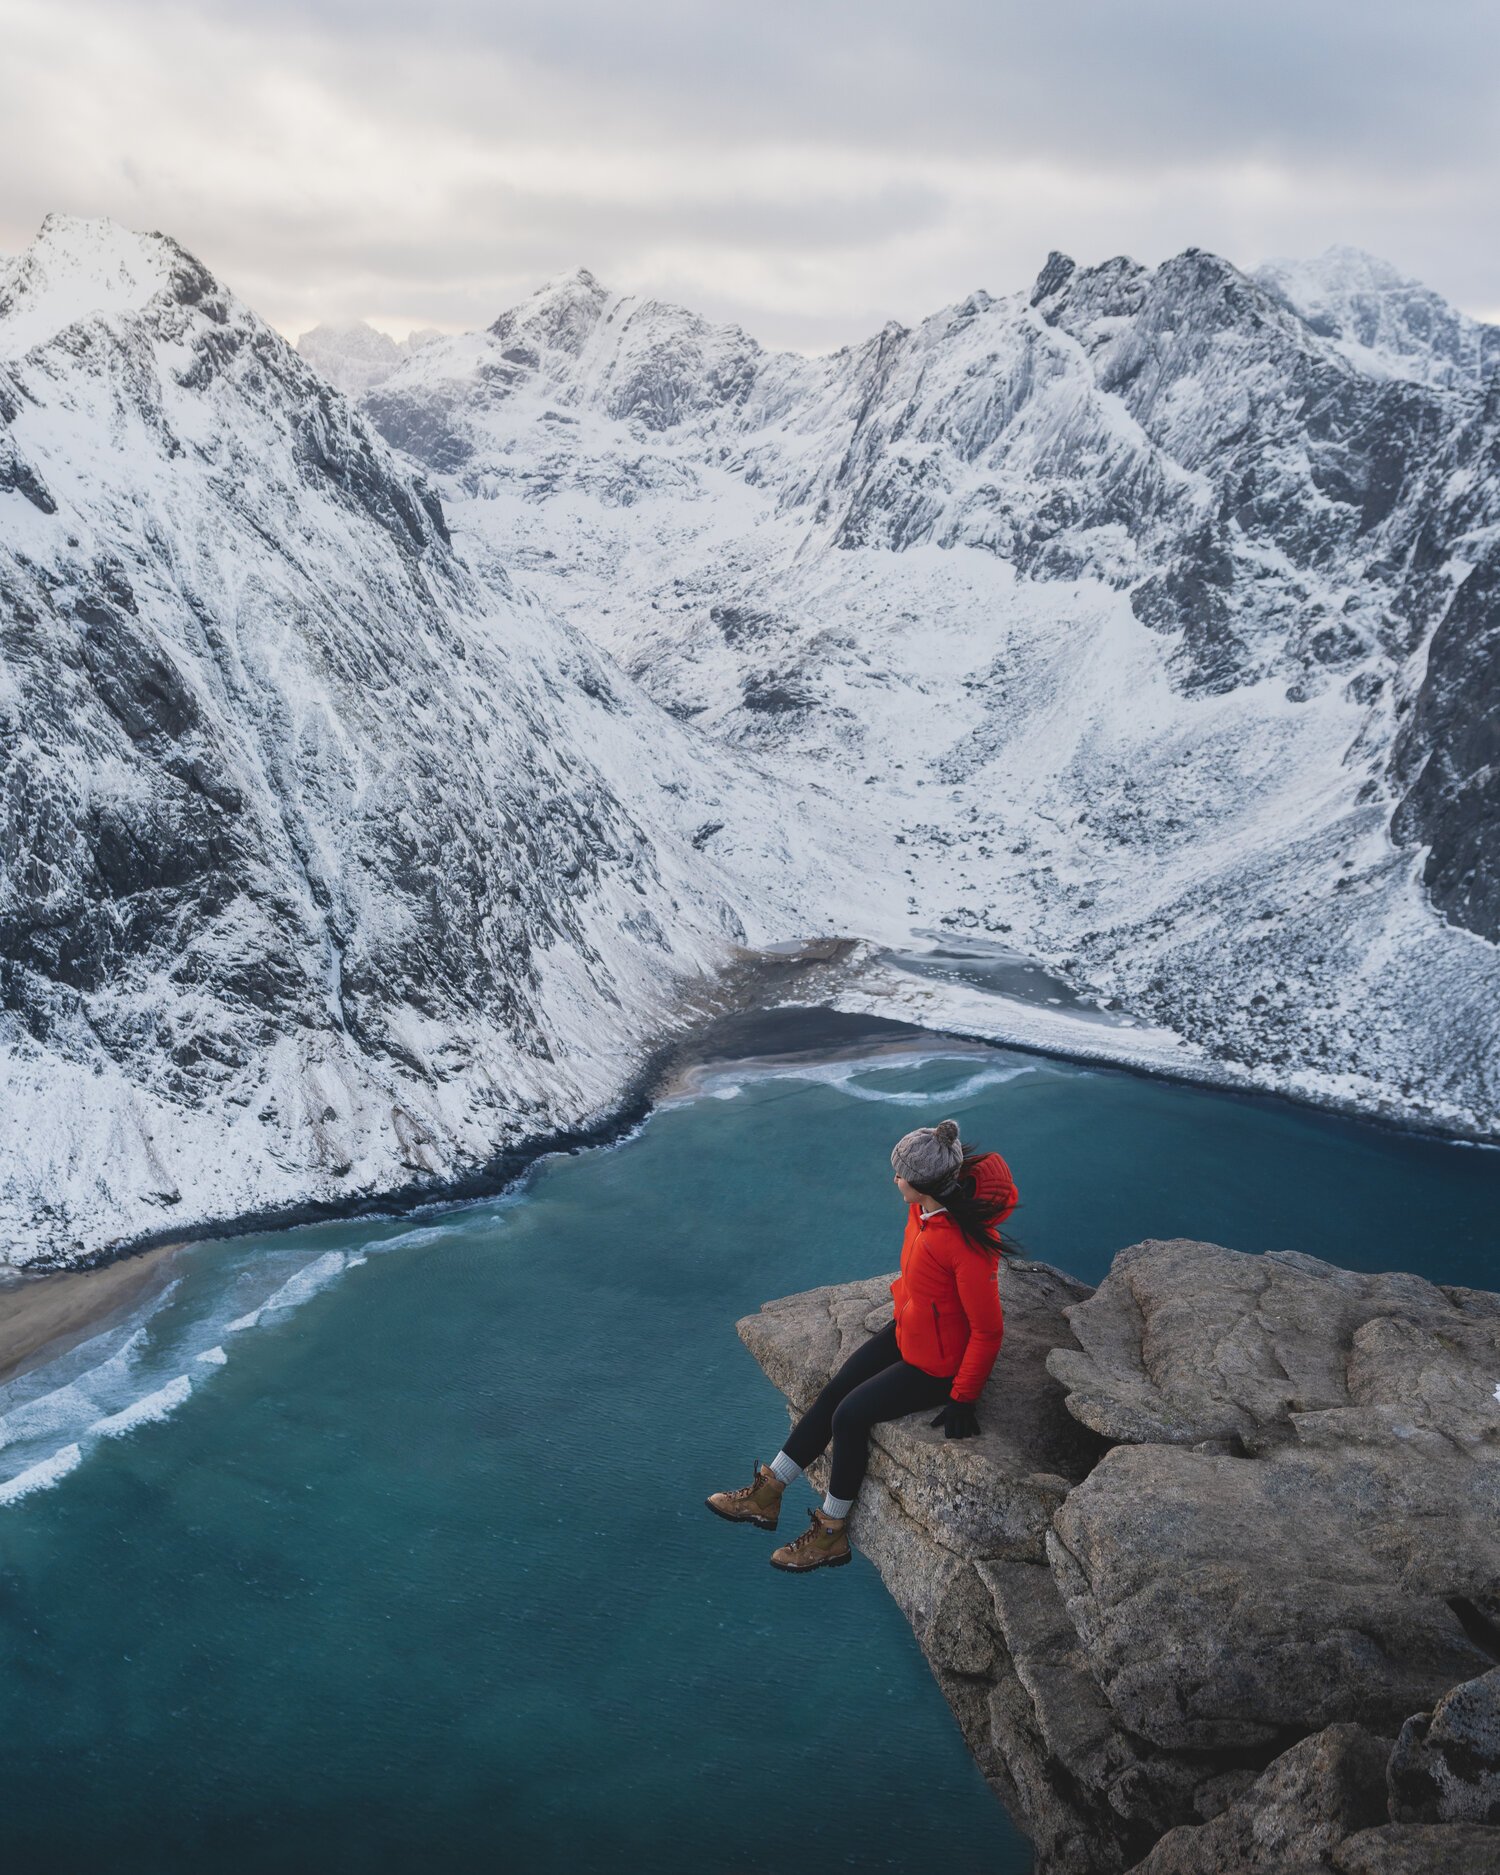
Winter in the mountains is incredibly magical and is a beautiful time to spend outdoors. Being born and raised in British Columbia, I’d say that I’m used to having snow in the alpine for a large portion of the year. I grew up skiing, and later changed to snowboarding, so I’m a huge fan of the white fluffy stuff… but when it comes to hiking, not so much. I’m someone who doesn’t get cold easily, yet I used to loath hiking in the colder months. It was a bit… dreadful. After a few winter seasons, I realized that it’s not that I didn’t like hiking in the snow, it’s that I wasn’t prepared. Winter hiking can quickly turn miserable and even dangerous, so in this blog post, you’ll be able to learn the ways you can keep safe, warm and and stoked!
Feel free to jump ahead to specific sections:
– Safety
– Navigating the Trial
– Proper Gear
– Food and Hydration
SAFETY:
- The Ten Essentials are items that will help you in emergency situations—so it’s good practice to pack them on both hiking day trips and camping trips. They don’t weigh that much in the grand scheme of things. They are navigation (map, compass, altimeter, GPS device, etc.), headlamp, sun protection (hat, sunglasses and sunscreen), first aid kit, knife, fire (matches, lighter and stove), shelter (emergency blanket), extra food, extra water and extra clothes. Many of these will be included in this blog post!
- Weather changes really fast in the mountains, especially in the winter. So, before you head out, make sure you have looked into what the current conditions are. Will the trail be icy? Will it have a foot of snow? How is the road to the trailhead and is it accessible? These are the questions you need to ask yourself. To look for trail conditions I do the following:
- Check the official park website.
- Check Instagram recent images and stories under a specific location.
- Call the local ranger station, ski resort or information center.
- Check online hiking forums from the area (ie. WTA, AllTrails, etc.).
- Check local Facebook hiking/outdoor groups (ie. Chilliwack BC Hiking Club).
- If it’ll be a sunny day, make sure you bring a hat, sunglasses and wear sunscreen (links to these items are below). The sun and UV rays are incredibly strong in the winter because they reflect off the snow. You can damage your skin, eyes and lips easily if you don’t prepare.
- Being aware of avalanches is really important in the winter. You can check avalanche.ca if you’re hiking in Canada or avalanche.org if you’re hiking in the US. If you’re looking to head into the backcountry, I suggest taking an avalanche course, finding friends that are experienced (check Instagram or Facebook groups) and doing a lot of research.
- If you feel like you’re feeling like you’re in over your head, turn around. If you lost the trail and can’t find the right path, turn around. If you ran late and you will run out of daylight and don’t have a headlamp with you, turn around. If you feel unsure of avy risk, turn around. If you or someone in your group isn’t prepared and they are freezing cold or hungry, turn around. There’s no shame in this, it shows you’re responsible!
- First aid kit: This one is self explanatory.
- Shop: Backcountry (US) or Altitude Sports (Canada)

NAVIGATING THE TRAIL:
- As always, tell a loved one where you are going, who you’ll be with and when you’ll be back. Make sure you leave a bit of time incase you spent a bit extra time taking photos, enjoying the trail, if your phone dies, etc. We want to avoid calling the authorities if help isn’t needed.
- Before you leave service, you need to download offline maps so that you have trail information at your fingertips. This is tremendously important, especially in the winter as trails are buried beneath snow and trail markers can be difficult to follow. You can download the trail on apps such as AllTrials, Maps.Me or Gaia GPS. These apps are incredible because once you download the trial, you don’t need cell service for them to work. You can also download offline maps on your GPS but this needs to be done before you leave service.
- There’s almost always no service when you’re in the mountains, so a GPS is needed in case of an emergency, to know where to go or to let loved ones know that you are safe. They are precise, comes with preloaded TOPO maps and two way messaging. It’s more than a basic GPS with features like a digital compass, barometric altimeter and accelerometer (which are a part of the Ten Essentials). You will need to buy a subscription for the SOS and text features—but it is well worth it. I recommend the Garmin InReach Mini or the Garmin inReach Explorer+. The benefit of choosing the Explorer+ is that you will always have a keyboard (where the Mini doesn’t so if your phone dies you can’t text). I recommend bringing a portable charger if you end up going the Mini route (which is what I did). I recommend bringing a portable charger if you end up going the Mini route (which is what I did).
- Shop Mini: Backcountry (US)
- Shop Explorer+: Backcountry (US) or MEC (Canada)


- Start early! Hiking in the winter season means you have less daylight.Also, when you hike in the morning, the snow is much more firm so it’ll help you limit postholing—which is when you step in the snow and step much deeper than you’d like creating a big hole on the trail. The snow gets more soft as the day goes on as the afternoon sun heats it up.
- When nature calls, pick up! Your body exerts more energy when you hold in urine because it needs to keep it at a particular temperature.
- If you’ve stopped hiking or enjoying a view and you get really cold, move your body. Jog in one spot, jump around, etc. If you get cold toes, move your toes around in your boot (do this anytime you stop and they’ll warm up). I also always put my hands under my arm pits (skin-to-skin) and it works every time!

PROPER GEAR:
- Having proper gear, and knowing how to wear and use it, is so important in the winter season. Search and Rescue teams always have to rescue hikers that are unprepared—wearing shorts, running shoes, not enough layers or have enough food and water. This is avoidable. I know we all start somewhere and make mistakes (I have my fair share of stories), but let’s try to stay clear of unnecessary calls for help.
- The key to staying warm in the winter is layering your gear properly (which I will detail below) and trying to avoid getting your gear wet (by both sweat and snow). Wet gear will make you cold once you stop hiking and it’s hard to dry. I recommend ‘starting cold’ (starting the hike in only a light layer) so you don’t soak through multiple layers. You’ll warm up pretty quick when you start moving and you’ll have to delayer along the trail anyways. I don’t sweat a lot, but if you do, I recommend bringing another dry base layer to change into once you make it to the viewpoint to stay warm.
- Invest in synthetic and wool base layers rather than cotton (as takes a really long time to dry and makes you feel damp and cold).
- Base layers: Layering up is key, starting from the base. In the winter, I almost always wear merino wool as it wicks moisture/sweat. It also helps with odor control and is sustainable.
- Shop top: Backcountry (US) or Altitude Sports (Canada)
- Shop leggings: Backcountry (US) or Altitude Sports (Canada)
- Shop sports bra: Backcountry (US) or Altitude Sports (Canada)


- Insulated layers: The next layer I wear is always a fleece or a puffy. On really cold days, I wear both (fleece, then puffy). I’ve been wearing Arc’teryx, Patagonia and Eddie Bauer for years.
- Shop Patagonia fleece: Backcountry (US) or Altitude Sports (Canada) | Shop Eddie Bauer fleece: EB (US) or EB (Canada)
- Shop Arc’teryx puffy: Backcountry (US) or Altitude Sports (Canada) | Shop Eddie Bauer puffy: EB (US) or EB (Canada)


- Shell: This is a critical layer to keep you dry! If you buy right the first time, you won’t have to buy ever again.
- Shop Arc’teryx: Backcountry (US) or Altitude Sports (Canada)
- Shop Eddie Bauer: EB (US) or EB (Canada)


- Pants: As you can probably tell from my photos, I almost always wear leggings when I’m outside. I don’t like to feel restricted. That said, I don’t get cold easily, so when I go on day hikes in the winter months, I wear any leggings or a thicker/brushed pair of leggings (like this Prana pair). On really cold days, I wear my warm Icebreaker pair—which are great on their own or as a first layer with another pair on top. It’s also good to note that I also bring an extra pair of leggings and waterproof hiking pants in case I need them. I just ordered a pair of Fjallraven pants as I hear great things in the community (make sure to get a pair that has a curved fit or else they look really baggy).
- Shop Prana leggings: Backcountry (US) or Altitude Sports (Canada)
- Shop Arc’teryx pants: Backcountry (US) or Altitude Sports (Canada)
- Shop Fjallraven pants: Backcountry (US) or Altitude Sports (Canada)


- Gaiters: Because I wear leggings, I wear gators to ensure I keep snow out of my boots. My boots stay dry for so much longer when I have these bad boys on. I chose the low option but either work beautifully! Even if you don’t think you’ll need them, pack them in your bag as you never know what the conditions are and they are very light.
- Shop Low Gaiters: Backcountry (US) or Altitude Sports (Canada)
- Shop High Gaiters: Backcountry (US) or Altitude Sports (Canada)


- Microspikes: I swear by microspikes for spring, winter and fall hiking. They are SO crucial and can save your life by avoiding slips and falls because they allow you to walk on icy surfaces like snow covered slopes or ice-covered rock. While they are made for ice and (a little amount of) snow, but they are also great to wear in really muddy conditions (ie. when hiking in Hawaii). Just like your gaiters, pack microspikes in your bag as you never know what the conditions are and they are light and small. I cannot stress how important microspikes are.
- Shop: Backcountry (US) or Altitude Sports (Canada)

- Snowshoes: When there’s loads of snow in the alpine, you know it’s time for snowshoes. The one thing I look for in snowshoes is if they have a heel lift. This is the bar that can be moved into an upward position that is right under your heel. It’s used only when snowshoeing uphill and helps so much. I also love purchasing MSR products because they are incredibly reliable and will fix gear in the case that it breaks.
- Shop: REI (US) or Altitude Sports (Canada)

- Hiking poles: Adjustable poles with snow baskets make life way easier when winter hiking. If you bought a pair for the summer season, check if they came with baskets—as they often do. Poles help distribute weight and reduce the impact on your joints and can help when you’re out in the alpine. You can shorten them when you go uphill or lengthen them when you descend. For flat trails or terrain, a trick I was taught was that you want to hold your poles and have your arm make a 90 degree angle.
- Shop: Backcountry (US) or Altitude Sports (Canada)

- Headlamp: I swear by this headlamp. It’s incredibly bright, rechargeable, light and overall is 10/10. I always bring a headlamp with me, even on day trips, because you have less daylight hours in the winter season. There’s nothing wrong with finishing your hike in the dark if you’re prepared with things like a headlamp. Just make sure it’s charged beforehand!
- Shop: Backcountry (US) or Altitude Sports (Canada)

- Handwarmers: Bringing handwarmers on your winter hiking adventures are KEY if you get cold easily! There are two options for keeping your hands toasty. Yaktrax Hand Warmersare compact and convenient warmers inside your gloves and are cheaper. While,Zippo Hand Warmer runes on fuel that generates a flameless heat, runs longer and less wasteful.
- Shop Hand Warmers: Backcountry (US) or Altitude Sports (Canada)
- Shop Zippo Hand Warmer: Backcountry (US) or MEC (Canada)


- Gloves: When you’re hiking or snowshoeing, glove liners are a great option because your movement will likely warm your hands up. When you stop moving, you’ll get colder, so mittens are the best to keep cozy! You could also invest in electronically-heated mittens if your hands get extra chilly.
- Shop glove liners: Backcountry (US) or Altitude Sports (Canada)
- Shop mittens: Backcountry (US) or Altitude Sports (Canada)
- Shop heated mittens: Backcountry (US) or Altitude Sports (Canada)


- Hiking boots: I wear my normal hiking boots as they are completely waterproof! You could buy an insulated boot, like this one, but it’s not necessary—especially if you only get out to the snowy alpine a few times in the winter season.
- Shop: Backcountry (US) or Altitude Sports (Canada)


- Socks: Wool socks are key for keeping your feet toasty.
- Shop : Backcountry (US) or Altitude Sports (Canada)

- Toques: I’m a big fan of toques… here are some of my favourites.
- Shop pompom toque: Backcountry (US) or Altitude Sports (Canada)
- Shop toque: Backcountry (US) or Altitude Sports (Canada)


- Buff/Balaclava: Both of these will protect you from the cold and the sun. I especially like to wear one if the wind has picked up and snow is flying around.
- Shop Buff: Backcountry (US) or Altitude Sports (Canada)
- Shop Balaclava: Backcountry (US) or Altitude Sports (Canada)


Sunglasses: Having sunglasses in the backcountry is key—especially in the winter! If you are snowshoeing on a sunny day, you need to protect your eyes from ‘snow blindness’. This is caused by overexposure to ultraviolet (UV) light to the cornea which essential gives your cornea a sunburn. You can get really disoriented and not see clearly (which is not how you want to be when you’re in the outdoors). I like to use these Ray-Ban as I can wear them out on the trial and in the city and because they block 100% of harmful UV rays.
- Shop : Backcountry (US) or Altitude Sports (Canada)

- Backpack: Since this blog post is for hiking, below is my favourite day bag. I usually bring at least a 30L on winter hikes as I always have more gear than I would have in the summer (ie. more layers).
- Shop: Backcountry (US) or Altitude Sports (Canada)

- Portable charger: Electronics die fast in cold weather so it’s good practice to bring a portable charger for your phone. I recommend bringing this if you end up going the Garmin Mini route (which is what I did) as if your phone dies, you’re screwed..
- Shop portable charger: Backcountry (US) or MEC (Canada)

FOOD AND HYDRATION:
- I suggest bringing something warm to drink in a thermos (ie. tea, hot water, hot chocolate, etc.). This will warm you up quick and is such a treat when you get to your viewpoint!
- When the temperature is below 0C the water in your tube will freeze up and it’ll become unusable. A hiker once told me a few other tricks to prevent freezing. One—fill up your hydration bladder with warm/hot water at home and then take small sips to keep the water moving in the tube when you’re on the trail. Two—after drinking water through the tube, blow the air into the hose to force the water back into the bladder (disclaimer: this has never worked for me, but it’s good to note). If these don’t work, I suggest bringing water in a Nalgene bottle (if it’s not too cold), a thermos because it’s insulated or an insulated tube for your hydration bladder. A tip for not having your Nalgene lid freeze on you is to store it upside down (make sure lid is tight).
- Shop insulated tube: Backcountry (US)
- Shop thermos: Backcountry (US) or Altitude Sports (Canada)
- Shop Nalgene: Backcountry (US) or Altitude Sports (Canada)
- Shop reservoir: Backcountry (US) or Altitude Sports (Canada)


- In the winter, your body will burn more calories than normal to stay warm, so make sure you eat! If you have trouble eating, snack on high-calorie foods like peanut butter, candy, etc. I always bring more food than I think I need in case of an emergency. If it’s below freezing outside, your snacks may freeze. To avid this, put some snacks in your inner pockets to keep them toasty.
- Don’t forget electrolytes! It’s so easy to not drink a lot of water in the winter since it’s cold outside, but it’s SO important to stay hydrated. Drinking water will electrolytes will ensure your vitamins and minerals are replaced and keeps your body feeling good. I don’t go on any hike without them.
Woah! I’m really digging the template/theme of this site. It’s simple, yet effective. A lot of times it’s very difficult to get that “perfect balance” between superb usability and appearance. I must say you have done a superb job with this. Also, the blog loads extremely fast for me on Safari. Superb Blog!
Aw, thank you so much for the kind words and for stopping by the blog. Means a lot!