
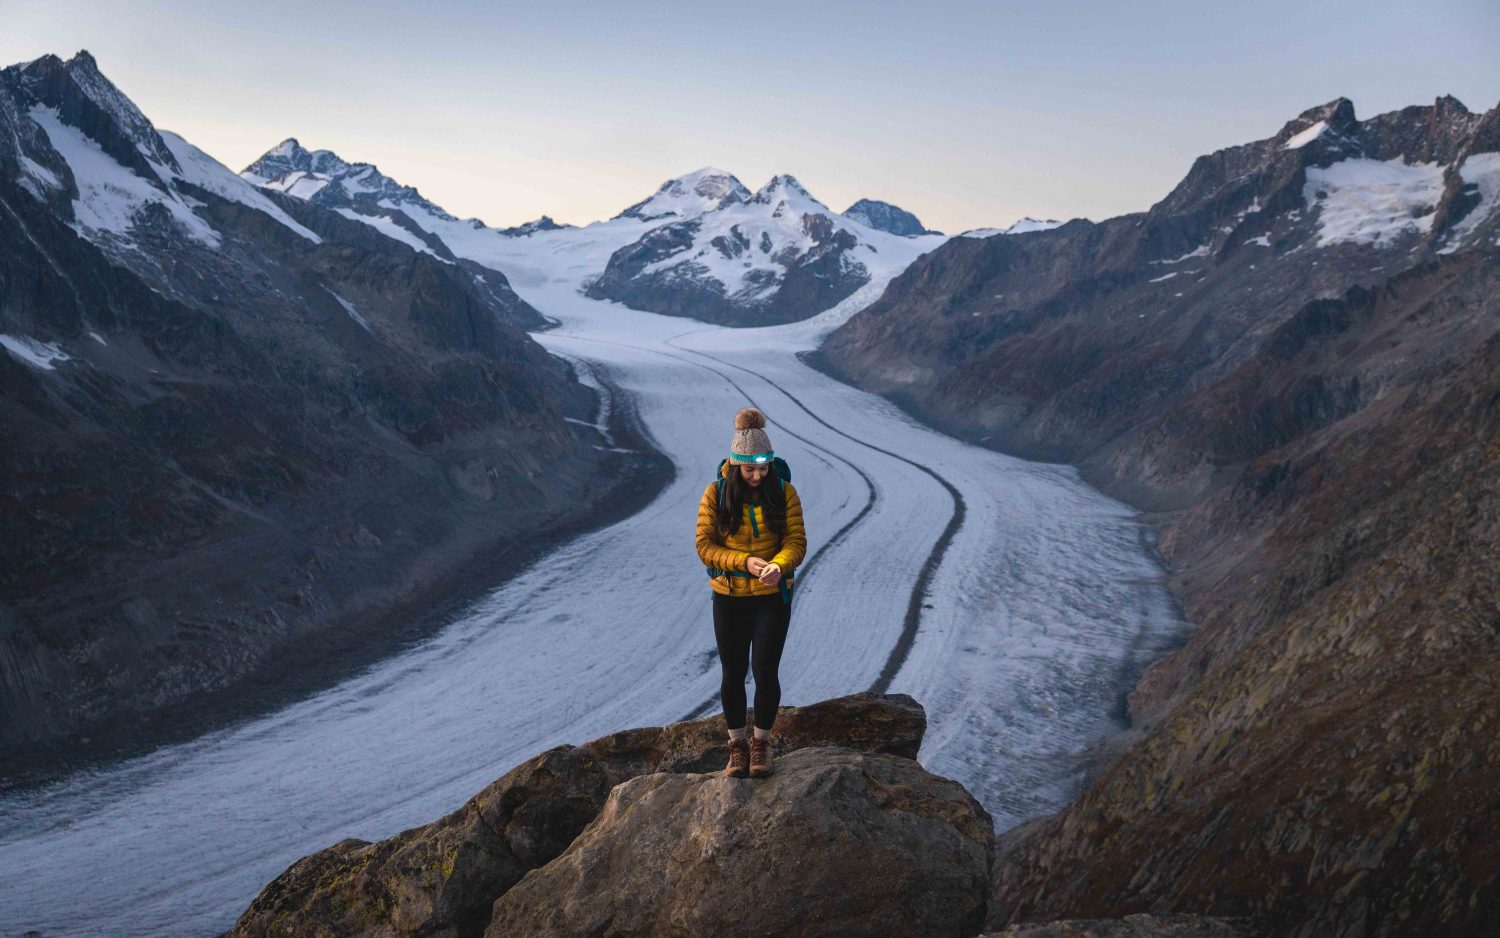
Hiking has always been my favorite way to get outside, but when I started becoming more passionate about photography I found myself itching to stay out for sunset or get up early to catch sunrise. I was hiking in the dark more and more in order to catch that glorious golden light and watch the sky change color. I’m not going to say I always feel 100% comfortable with hiking in the dark… but do I feel better each time I do it. I make sure to pack accordingly and take the proper steps to be safe because it helps ease any stress I may have.
Even though it can be nerve-wracking to start hiking in the dark it is a beautiful experience. The night sky is full of stars (the more remote you are, the brighter the sky will be), it’s peacefully quiet and there is new wildlife buzzing around. So, get ready to slow down, listen and experience something new! I’ll be sharing all my tips about safely hiking at night so you can do it too (and feel good about it) in this blog post.
This blog post is in collaboration with Backcountry—an incredible outdoor retailer that is a one-stop shop for everything hiking, camping, climbing, and more. Get 24/7 advice from their Gearheads, choose from an amazing selection of good quality gear, quick shipping, and easy returns. This post also contains some affiliate links, which means if you buy something I will receive a small commission (at no extra cost to you).
Hike a Trail You’re Familiar With
Everything looks different in the dark, so in order to get used to hiking at night, it may bring you some comfort to hike a trail you’ve done before. Starting on short hikes and slowly increasing the length will also help ease you into hiking in the dark. Even if you’ve been on the trail before, make sure you slow down. My hiking pace is slower in the dark because it takes a touch longer to navigate rocks, roots, and the trail in general.
Pack The Right (and Extra) Gear
Layering up is key when hiking in the dark because the temperature drops during the night. It’s important to bring extra layers in case you need extra warmth or the weather changes. Here are some of my go-to layers:


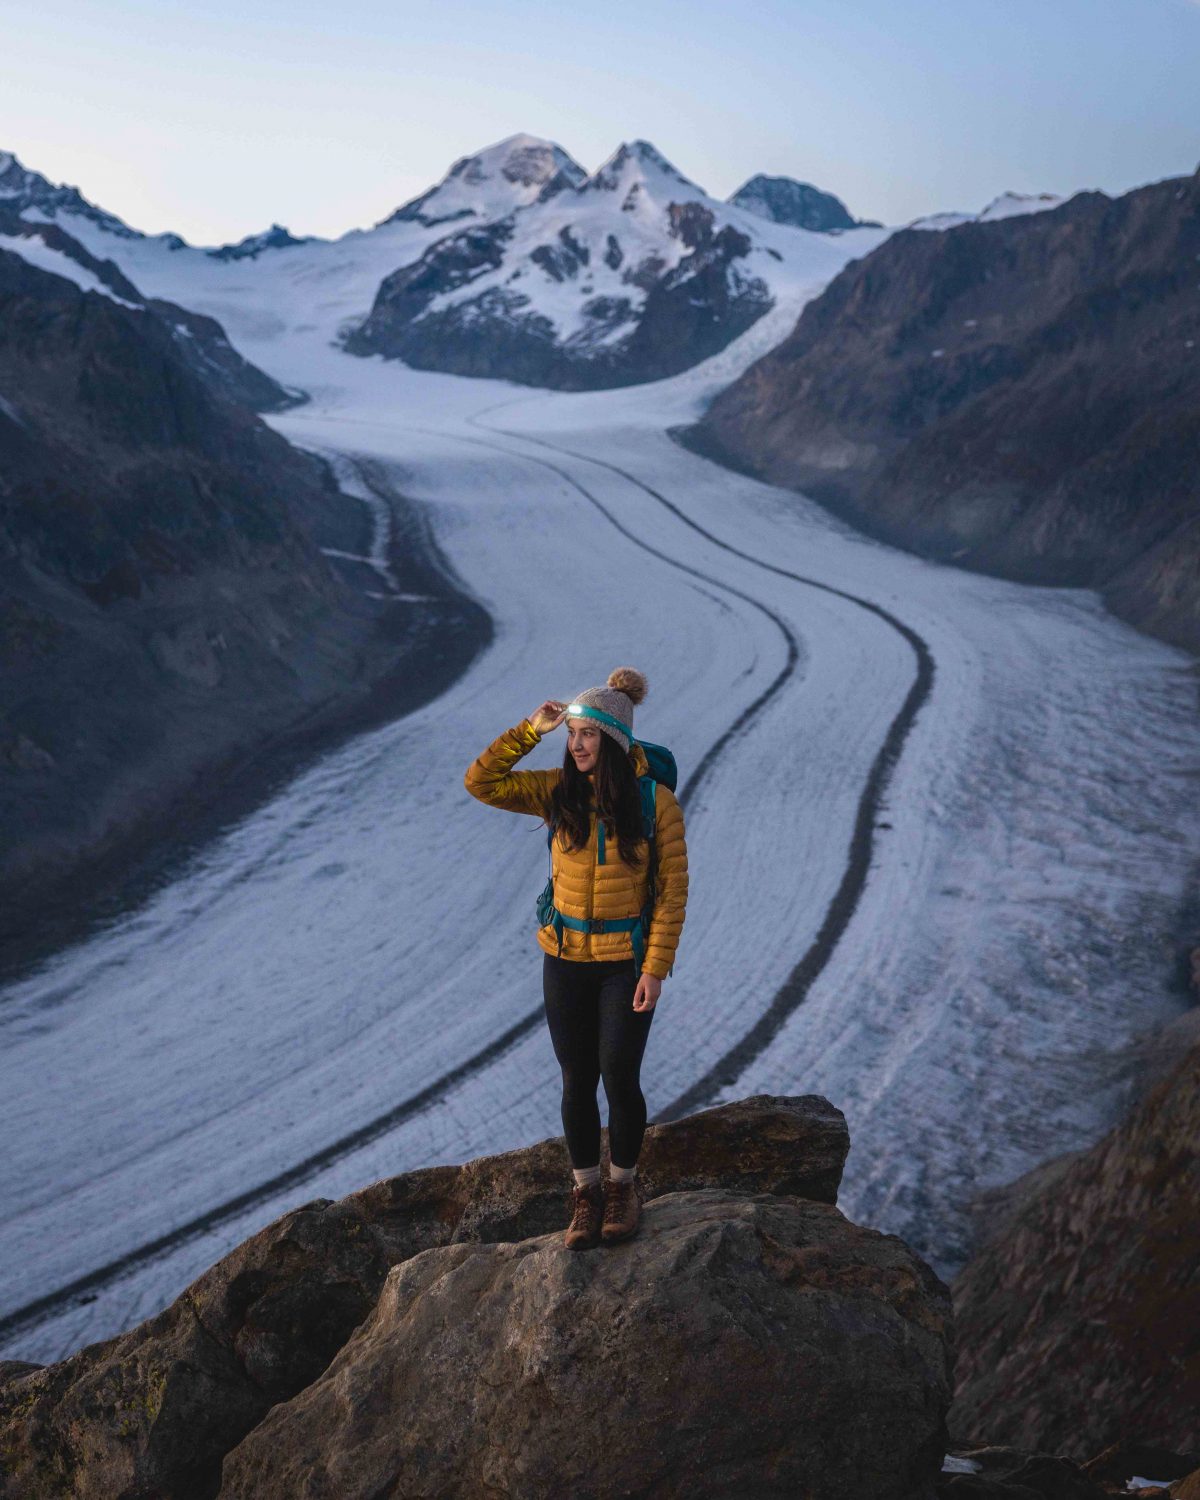
Along with layers, you’ll need a good light source. I have tried several headlamps over the years and the BioLite headlamp takes the cake. It’s really bright and rechargeable so there’s no need to buy batteries all the time. Just make sure you charge it before every adventure. To go an extra step, you can even bring the charging cord (along with a portable charger) just in case! My headlamp usually lasts 1-2 hikes depending on how long they are.


Some other pieces of gear that I always use when hiking in the dark are hiking poles for stability, hiking boots for comfort, and a large backpack for the extra layers, a tripod, snacks and more.


Pack Smart and Know Your Gear
By packing smart, you’ll lessen the time you have to dig into your backpack for something you need. I always have my headlamp in one of the top pockets, usually in the brain of my backpack so it’s easily accessible after sunset. I also have snacks, a first aid kit, a portable charger, and electrolytes near the top, too. I have my warm layers close by so I can grab them quickly and the heavier items on the bottom (like camera gear, water, etc.).
You don’t want to be trying to figure out how your headlamp works when it’s dark. The same goes for your hiking poles or other gear. So be sure to test it all out before you head out on the trail.
Plan For Good Weather
Weather makes a big difference with navigating trails, especially at night. Fog, rain, etc. can confuse you easily so try and hit the trail when it’s clear. If there’s a full moon, the moonlight may light up the trai which is always a bonus.
Stay On Trail
Even if you’ve done a trail before in the day, it’s a good bet that it’ll look different at night. Staying on trail is incredibly important because you can get disoriented quickly! To tackle this, follow the trail markers as you would in the day. A lot of the time, at least in British Columbia, these markers are reflective so they’ll light up when you shine a light on it. Along with following the trail markers, I always have an offline map downloaded on my phone to double-check I’m in the right place. I download the hike on AllTrials and the general area on Maps.Me. Once you download the information, you don’t need cell service for them to work (but you’ll need to download them beforehand when you’re in service).
I also bring my Garmin Mini with me. With this piece of gear, I’m able to message my family (they always get uneasy when they know I’m hiking in the dark), call for help if there’s an emergency and more. I waited a couple of years to take the plunge and invest in the Garmin because they are a little pricey, but now that I have one I wish I had done it sooner. I thankfully haven’t had to use the SOS feature, but it makes me feel so good knowing that I can, if needed.
Since you’ll need your phone to navigate the trail, to use the Garmin Mini, and more, you’ll need to ensure that it doesn’t die. Phone batteries die more quickly in the cold (and since it’s colder outside at night), don’t forget to pack a charger.


Be Alert and Bear Aware
There are all sorts of animals that are more active at night. It’s really important to do your research about animals that are common in your area and know what to do if you encounter one. For instance, in British Columbia, bears are the most active at dawn and dusk, and some deer, coyotes, and critters will also be active. Being loud and in a group of four or more people is the best way to avoid an encounter with an animal.
Since it’ll be dark, it’s harder to spot wildlife. This is why it’s important to be alert and listen. It’s also important to make noise to let animals know that you’re coming down the trail. Always talk, sing, clap, or yell so your presence is known. Listen for movement around you and don’t panic if you hear something. Be sure to have bear spray in an easily accessible spot on you, just like you would on any other hike.

Squad Up
Not only is it safer to hike in a group, but it’s also more fun. Experiencing the outdoors with friends is one of the best ways to make memories. I always strive to get a group of four people together. As mentioned, be sure each person is making noise and is aware of their surroundings. The more people do this, the better. Also, make sure that you stay close together in case there’s an injury and you get split up.
There’s a good chance you’ll hear a twig break or branch fall. I like to be in a group because if this happens, sometimes we can think of the worst-case scenario. It’s nice to have a friends that can remind you that you’re safe and elevate stress if this is the case.
Share your plans with someone
Just like if you were hiking in the day, it’s imperative that you share a detailed plan of what you’re doing with a loved one—including where you’re going, who you’re with, where you parked, and when you should be back in service. The more details, the better.
Trail Manners
In the case that you cross paths with other groups, be sure to change your headlamp settings to the red light, or cover or move the light entirely when people pass by. There’s nothing worse than getting blinded by a headlamp when you’re trying to navigate a dark trail.
I hope these tips helped you feel more confident hiking in the dark. Let me know in the comments which hike you’re planning to crush or if you’ve already hiked at night before. As always, thanks for reading.
All photos were shot by Brendin Logan.
I once hiked to Mount Saramati in Nagaland, India at night and returned to the base village at night too. The night trek was challenging as it started raining and the trails became muddy. It was my first high-altitude trek but was unprepared. I lacked the proper gear, but overall, it was the best learning experience.
Wow, that sounds like an incredible learning experience (and adventure).
It indeed was. Having the right travel and hiking essentials help a lot.